Upholstery cleaning step by step for stubborn stains
Spilled tea on a pale sofa? Mud on the armchair after a wet London commute? We've all had that moment where a stain looks small at first, then somehow grows a personality. The good news is that upholstery cleaning step by step for stubborn stains does not have to be a guessing game. With the right preparation, the right cleaner, and a bit of patience, you can improve most marks without damaging the fabric.
This guide walks you through the process in a practical, no-nonsense way. You'll learn how to identify the fabric, treat stains safely, avoid common mistakes, and know when it is smarter to stop and call in a specialist. If you also want broader fabric care support, the service page for professional upholstery cleaning is a useful place to start.
Table of Contents
- Why this step-by-step approach matters
- How upholstery cleaning works
- Key benefits and practical advantages
- Who this is for and when it makes sense
- Step-by-step guidance
- Expert tips for better results
- Common mistakes to avoid
- Tools, resources and recommendations
- Law, compliance, standards, or best practice
- Options, methods, or comparison table
- Case study or real-world example
- Practical checklist
- Conclusion
- Frequently asked questions
Why Upholstery cleaning step by step for stubborn stains Matters
Upholstery is different from hard surfaces. A stain that sits on a table can be wiped away. On a sofa or dining chair, it sinks into fibres, backing, padding, and sometimes the adhesive layers underneath. That means the wrong move can spread the mark, set it deeper, or leave a ring that is even more obvious than the original spill.
Stubborn stains also vary more than people expect. A coffee spill behaves differently from grease, ink, makeup, pet accidents, red wine, or dried food. Each one needs a slightly different response. In practice, a careful step-by-step method saves time because you do less damage the first time around. Truth be told, that's the real win.
It also matters for hygiene. Upholstery can trap dust, odours, oils from skin, and everyday grime. Even if a stain is mostly cosmetic, it can still make a room feel tired, sticky, or neglected. If you've ever walked into a living room at 7 a.m. and spotted a dark patch on the sofa in full daylight, you know exactly what I mean.
How Upholstery cleaning step by step for stubborn stains Works
The process works by breaking the job into layers. First you identify the fabric and the stain. Then you remove loose debris, test a cleaning solution, work from the outside in, lift the stain without over-wetting the material, and finish by rinsing, drying, and grooming the fibres if needed.
The science is simple enough. Stains attach to fibres through oils, pigments, sugars, proteins, or tannins. The cleaner you use has to loosen that bond without harming the fabric. That is why one "universal" product rarely works on everything. Velvet, cotton, linen, polyester blends, microfibre, and leather all behave differently. Some can take light moisture; others really can't.
A good method also respects the upholstery code on the care label. You may see symbols or letters that indicate water-based cleaning, solvent cleaning, or professional-only care. If the code is unclear, a cautious spot test is the sensible move. No drama, just common sense.
Key Benefits and Practical Advantages
Using a structured approach brings a few clear advantages.
- Less risk of damage: You are less likely to bleach, distort, shrink, or bruise the fabric.
- Better stain removal: Working in the right order helps lift the stain instead of grinding it in.
- Cleaner finish: You reduce water marks, residue, and "cleaned but patchy" results.
- Longer fabric life: Proper care preserves the look and feel of the upholstery for longer.
- Better odour control: Treating stains properly helps remove smells as well as visible marks.
There is also a practical household benefit. If you clean a sofa properly once, you often avoid repeating the same mess with more and more product. That matters when you're balancing family life, work, and the usual chaos of a shared home. Nobody wants to spend half a Saturday chasing a stain around with a damp cloth. Been there, not ideal.
For readers comparing professional support options, related services such as sofa cleaning and rug cleaning can be useful if the problem has spread beyond one item.
Who This Is For and When It Makes Sense
This guide is for anyone dealing with marks on fabric furniture at home, in a rented property, or in a small office lounge. It makes sense if the stain is fresh, if the upholstery is in decent condition, and if you are willing to do a careful spot test before applying anything more ambitious.
It is especially useful for:
- homeowners trying to rescue a favourite sofa
- tenants wanting to improve a mark before checkout or inspection
- families dealing with everyday food and drink spills
- pet owners managing the occasional accident
- small offices keeping reception seating presentable
It may not be the right DIY job if the stain is old, the fabric is delicate, the filling smells damp, or the item has already been cleaned multiple times with mixed results. In those cases, a deeper approach may be needed. If your whole property needs a reset after busy seasons or guests, a broader deep cleaning visit can sometimes make more sense than chasing one problem area in isolation.
Step-by-Step Guidance
1. Check the fabric label first
Before you touch the stain, find the care label if there is one. This tells you whether the material can be cleaned with water, a solvent, or only by a professional. If there is no label, assume the fabric is more delicate than it looks. That sounds cautious, but it saves people a lot of regret.
2. Identify the stain type
Different stains need different tactics. Food and drinks are usually water-based or oily. Grease and makeup need degreasing. Ink and dye-based stains are more stubborn. Pet accidents need a combination of stain removal and odour control. Knowing what you are dealing with helps you choose the right cleaner and stop before things get worse.
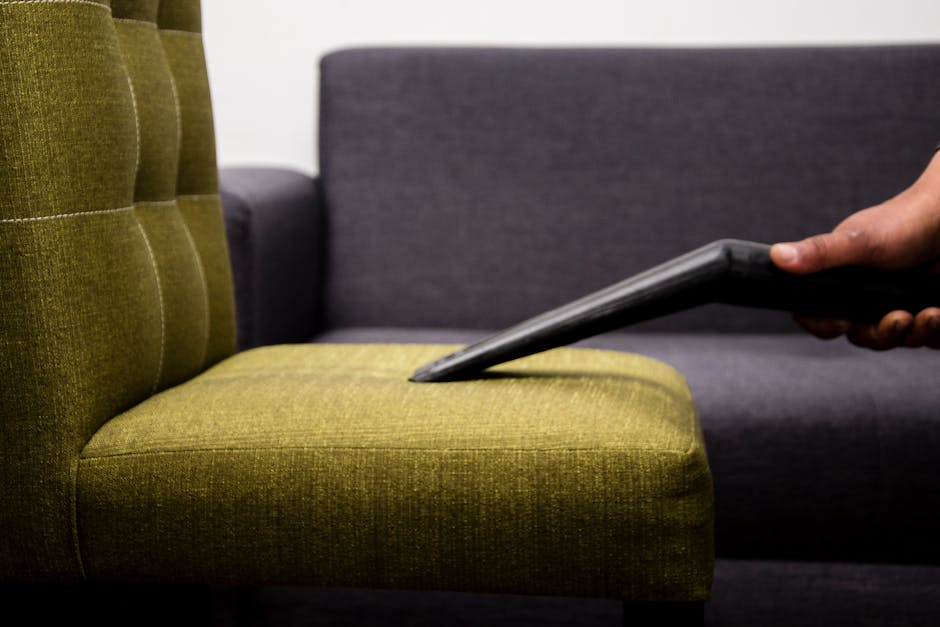
3. Remove crumbs and surface dirt
Use a vacuum with an upholstery attachment to lift loose particles first. If you skip this, the particles can turn into muddy paste once moisture is added. Focus on seams, tufting, creases, and under cushions. To be fair, this is the bit most people rush, and it matters more than it looks.
4. Blot, don't rub
Use a clean white cloth or paper towel to blot excess liquid. Work gently from the outside edge toward the centre. Rubbing pushes the stain deeper into the fibres and can rough up the nap. On textured fabric, a hard rub can make the patch look fuzzy even after the stain is gone. Not great.
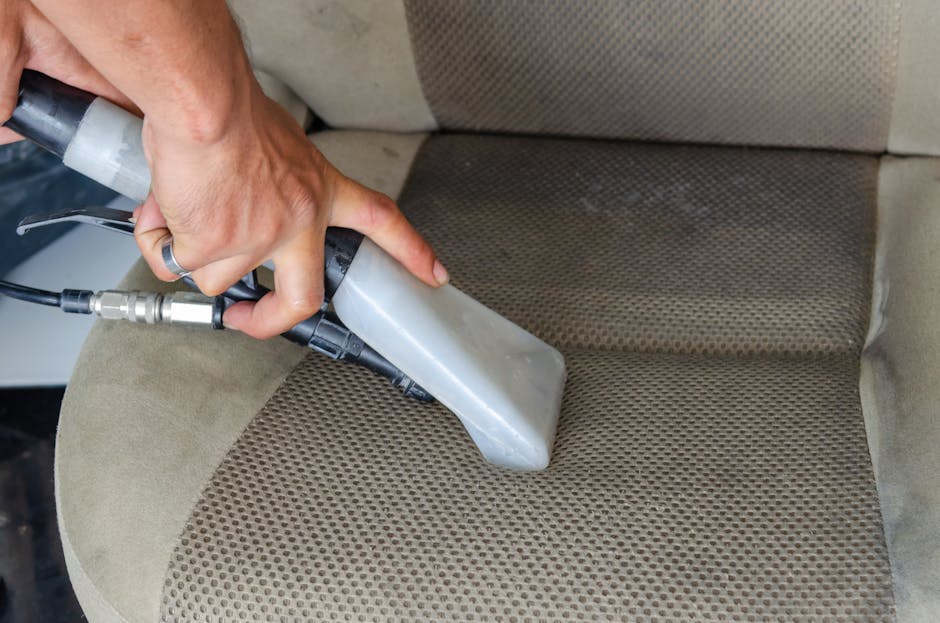
5. Test your cleaner in a hidden area
Pick a concealed spot such as the back, underside, or lower rear edge. Apply a small amount of your chosen cleaning solution and wait for it to dry. Check for colour loss, texture changes, or water rings. If anything looks off, stop and choose a milder product or call for help.
6. Choose the right solution for the stain
For many fresh marks, a mild upholstery-safe detergent solution is enough. For grease, a fabric-safe degreasing cleaner may be more effective. For protein-based stains like food or pet mess, a gentle enzyme cleaner can help. Use as little liquid as possible. Upholstery does not need to be soaked. It really doesn't.
7. Apply lightly and work slowly
Put the cleaner on the cloth first rather than pouring it directly onto the fabric. Dab the stain in small sections. Let the solution sit for a short time if the product directions allow it, then blot again with a clean cloth. Repeat patiently. Stronger pressure usually does not mean better results.
8. Rinse out residue carefully
Once the stain lifts, use a slightly damp cloth with clean water to remove leftover product. Residue can attract dirt later, which means the stain comes back as a dull patch. This is one of those annoying little details that separates a decent clean from a good one.
9. Dry the area properly
Blot with a dry towel, then leave the area to air dry with good ventilation. If the fabric allows it, open windows or use a fan. Do not sit on the upholstery until it is fully dry, and avoid heat that could warp fibres or set remaining marks. Damp fabric also holds odours longer than people expect.
10. Finish by brushing or fluffing the fibres
Once dry, use a soft brush to restore the nap if needed. This helps the cleaned patch blend back into the surrounding fabric. On pile fabrics, brushing in one direction can make the finish look more even. Little detail, big difference.
What if the stain is still there?
If the mark remains after one careful cycle, repeat only once or twice with a stronger but still fabric-appropriate approach. If nothing changes, stop. At that point, repeated scrubbing can do more harm than good, especially on light-coloured or delicate upholstery.
Expert summary: The safest stain removal method is usually the one that moves slowly, uses minimal moisture, and respects the care label. The goal is not just to remove the mark today, but to keep the fabric usable tomorrow.
Expert Tips for Better Results
A few field-tested habits make a surprising difference.
- Use white cloths only: Coloured cloths can bleed dye into pale fabric.
- Start with the least aggressive option: Mild cleaning is better than over-treating from the outset.
- Work in good light: Natural daylight reveals residue and rings that indoor lighting can hide.
- Keep the room ventilated: Faster drying means less chance of lingering smells.
- Use small movements: Short, controlled dabs are better than broad wiping.
One extra tip many people miss: photograph the stain before you clean it. That way you can actually tell whether it improved. Memory is funny like that. Everything can look "about the same" after twenty minutes of effort.
For bulky items or entire rooms that need attention, many households pair stain treatment with one-off cleaning so the rest of the space gets handled at the same time.
Common Mistakes to Avoid
Most upholstery damage from DIY cleaning comes from a handful of predictable mistakes.
- Scrubbing too hard: This can spread the stain and roughen the fabric.
- Using too much water: Over-wetting can create rings, shrinkage, or odours.
- Skipping the patch test: The patch test is boring, yes, but it is also your safety net.
- Using household bleach or harsh chemicals: These can strip colour or weaken fibres.
- Mixing products: A bad idea on upholstery and not something to improvise with.
- Ignoring drying time: A sofa that still feels damp can become a mould risk in the worst cases.
People also forget the stain's age. A fresh spill is usually manageable. A stain that has been heat-dried, sat on, or treated repeatedly is much harder. That does not mean impossible, but it does mean expectations should be realistic.
Tools, Resources and Recommendations
You do not need a truckload of equipment. A simple, well-chosen kit usually works better than a shelf of random sprays.
| Tool or product | Why it helps | Best use |
|---|---|---|
| Vacuum with upholstery tool | Removes dust, crumbs, and loose debris | Before any wet cleaning |
| White microfibre cloths | Shows transferred stain and avoids dye transfer | Blotting and rinsing |
| Soft brush | Restores fabric texture after drying | Finishing pile fabrics |
| Mild upholstery-safe cleaner | Suitable for general spot cleaning | Most fresh stains |
| Enzyme cleaner | Breaks down organic messes | Food, pet accidents, some odours |
| Dry towels | Helps lift moisture quickly | After cleaning and rinsing |
If you are unsure where to begin, it can help to think in layers: vacuum, test, treat, rinse, dry, finish. That rhythm is simple and, honestly, easier to remember under pressure. For broader household upkeep, services like domestic cleaning or house cleaning may be worth considering if the issue is part of general wear and tear rather than one isolated stain.
Law, Compliance, Standards, or Best Practice
There is usually no special legal rule for cleaning your own sofa at home, but there are sensible best practices to follow. If you are cleaning in a rented property, it is wise to keep to the tenancy agreement and avoid causing damage while trying to improve appearance. For landlords and letting agents, evidence of careful maintenance matters more than dramatic cleaning claims.
In workplace settings, basic health and safety expectations apply. That means using cleaning products correctly, ventilating the space, and storing chemicals securely. It also means being careful with electrical equipment near damp fabric. Small details, but they matter.
If you are hiring a cleaning company, ask whether they carry appropriate insurance, understand fabric codes, and work with a cautious stain-testing process. The service pages on insurance and safety and health and safety policy are helpful reference points for understanding what a professional provider should be able to explain clearly.
Best practice is not about perfection. It is about reducing risk, using suitable methods, and knowing when a problem is beyond standard spot cleaning.
Options, Methods, or Comparison Table
Not every stain should be tackled the same way. Here's a practical comparison of common approaches.
| Method | Good for | Pros | Limits |
|---|---|---|---|
| Mild detergent spot cleaning | Fresh food, drink, everyday marks | Simple, low-cost, gentle | May not remove set stains |
| Enzyme cleaning | Organic stains and odours | Useful on pet mess and food residue | Needs dwell time and careful rinsing |
| Solvent-based cleaning | Some oily or ink-based stains | Can be effective on stubborn marks | Not suitable for all fabrics; patch test essential |
| Steam or hot-water extraction | Deeper overall cleaning on compatible fabrics | Refreshes larger areas and lifts embedded soil | Risky on delicate materials or over-wet fabrics |
| Professional upholstery cleaning | Set stains, delicate fabrics, larger furniture pieces | More controlled, often more reliable | Higher cost than DIY |
The right choice depends on the fabric, the stain, and how much risk you are willing to take. If the item is valuable or sentimental, the safer option often wins. That old armchair from your nan may be worth more than the cleaning product bill, after all.
Case Study or Real-World Example
A fairly typical case: a cream fabric sofa with a tea spill on one cushion and a greasy fingerprint mark along the arm. The tea stain was only a day old, while the grease had been there long enough to darken slightly at the edges. A careful vacuum, a patch test, and two rounds of light blotting with an upholstery-safe cleaner improved the tea mark almost completely. The grease needed a separate approach with a more suitable product and a longer dwell time.
What made the difference was not brute force. It was patience. The cleaner was applied to cloth, not directly onto the sofa. The area was left to dry properly with a window open for an hour or so. And because the fabric was treated gently, the final result looked even rather than patchy.
By contrast, a second cushion that had been scrubbed vigorously by someone in a hurry showed a slightly rough texture even after the stain faded. That is the trade-off, really. The mark might reduce, but the fabric remembers.
Practical Checklist
Use this quick checklist before and during stain removal.
- Identify the fabric care label if possible
- Confirm what kind of stain you are dealing with
- Vacuum loose debris first
- Test any cleaner in a hidden area
- Use a white cloth for blotting
- Work from the outside of the stain inward
- Apply as little moisture as possible
- Rinse lightly to remove residue
- Dry fully with ventilation
- Brush the fibres once dry if needed
- Stop if colour changes or the fabric starts to distort
If you can tick most of these off, you are already ahead of the average DIY attempt. Small wins matter here.
Conclusion
Stubborn upholstery stains can feel overwhelming at first, especially when they are on a favourite sofa or in a room everyone sees. But a calm, step-by-step method gives you the best chance of improving the mark without making the fabric worse. Start with the label, test before you treat, use minimal moisture, and dry thoroughly. That is the whole game, really.
If a stain is old, large, or sitting on a delicate fabric, it is usually worth stepping back and choosing a more careful professional route. A little restraint now can save a lot of regret later. And if you are dealing with other items around the home too, services such as a trusted cleaning company or getting in touch for advice can help you decide what should be tackled first.
Get a free quote today and see how much you can save.
There is something satisfying about seeing a sofa look like itself again. Not perfect, just properly cared for. That's enough, and it's a good feeling.
Frequently Asked Questions
What is the safest way to start upholstery cleaning for a stubborn stain?
Start by checking the care label, then vacuum the area and test your cleaner in a hidden spot. That simple order prevents most avoidable mistakes and gives you a better chance of lifting the stain cleanly.
Can I use washing-up liquid on upholstery?
Sometimes, but only in a very diluted form and only if the fabric can handle a water-based clean. It is safer to use a product designed for upholstery because ordinary washing-up liquid can leave residue or create new marks.
How do I remove old stains from a sofa?
Old stains usually need more patience than force. Blotting, light repeated treatment, and proper drying can help, but if the stain has set deep into the fibres, a professional clean may be the better option.
Why does my upholstery look worse after cleaning?
That usually happens when too much liquid is used, residue is left behind, or the fabric dries unevenly. Water rings and patchiness are common signs that the cleaning method needs adjusting.
Is steam cleaning safe for all upholstery?
No. Steam and hot-water extraction are useful on some fabrics, but delicate materials can shrink, distort, or hold too much moisture. Always check the care code first.
How long should upholstery take to dry after spot cleaning?
Drying time varies with fabric type, room temperature, and airflow. A light spot clean may dry within a few hours, but thicker cushions can take longer. Good ventilation helps a lot.
What is the best cleaner for grease stains on upholstery?
A fabric-safe degreasing product is usually more effective than a general cleaner. Apply it sparingly and always patch test first, because grease removers can be too strong for some textiles.
Can I clean a stain without leaving a water mark?
Yes, if you use minimal moisture, blot carefully, and dry the area evenly. Working from the outside in and avoiding over-wetting are the two big things that help.
When should I stop trying to remove a stain myself?
Stop if the colour starts lifting, the fabric changes texture, the stain spreads, or repeated attempts are not improving it. At that point, more DIY effort may just make the problem bigger.
How often should upholstery be deep cleaned?
That depends on use, pets, children, and overall household traffic. In many homes, periodic maintenance plus occasional deeper attention is enough to keep furniture looking presentable and feeling fresher.
Can professional upholstery cleaning help with odours as well as stains?
Yes, especially where the smell is linked to trapped residue, spills, or pet accidents. A proper clean can often improve both the visible stain and the lingering odour.
Is it worth hiring a professional for one stubborn stain?
If the furniture is valuable, delicate, or already lightly damaged, yes, it can be worth it. A specialist approach often costs less than replacing a sofa or living with a permanent mark you hate seeing every day.